
When this posts, I'll be out Christmas tree hunting and will definitely not have any studio news to share, so Anna was kind enough to help me keep up the Blogidays roll.
This is a perfect topic for those of you wanting to try out mini tack, but not sure you really want to invest a lot of cash into it yet. Take it away, Anna!
Make Your Own Stablemate Stirrups
For as long as I can remember, I've alway thought - Why buy it when I can make something almost as good myself? This mentality has lead to everything from trying to knit my own socks to horror story quality customs.
However, this idea stubbornness works well when what you're trying to make is so small, most people probably won't be able to see it very well anyway (at least this is what I tell myself).
 |
| I'm growing a garden of stirrups |
That said, I have never found the appeal of spending many dollars on itty bitty pieces of metal that will just hang from my saddles. They're barely seen. I mean, I already made the saddle... so go big or go home, right? Right?
 |
| Note from Grace: These are the cast irons I use from Horsing Around UK |
I've been using this method of stirrup making pretty much since I first started making saddles for the stirrups to hang from. It works well, and I've learned to make them in batches of 10 or so pairs so I can feel surprised when they're already there and ready for me. (It's the little things.)

You'll need:
- Tin Snips
- Some nice thick-ish wire. I use the green botanical stuff from Michael's
- Needle Nose Pliers
- Scrap Leather (any color)
- Silver Paint
- Some Color Paint
- Scissors
- A saddle/horse (optional - for figuring out stirrup size)
- Silver Sharpie (optional... kind of)
I start off by cutting off a good length of wire. Better to waste a little than find out your piece is too short in the middle of a stirrup.

Take those handy needle-nose guys and grab the wire so that theres some on either side.

After doing this enough I was smart enough to sharpie-and-clear-nailpolish a mark on the pliers so I would always get the same sized stirrups. I highly recommend doing this once you find the place on the pliers that gives you the right size. (up until then it's just trial and error)

Fold the short piece of the wire over the top of the pliers like so:

And then take the longer piece and stick it straight up along the side of the pliers.

Next, use your thumb nail or tweezers to fold over the long piece not quite against the pliers but so that it makes a little loop over the top of the short wire piece.

Here's a handy diagram:

Next you'll fold the short tail across the flat inside part of the pliers and squish it flat...

And then repeat with the long part of wire.

Another handy diagram:
 |
| In reality the two short pieces across the bottom will be next to each other, I drew it like this so you could see both easier |
Wiggle it off the pliers, clip off the extra short end, and tada! The skeleton of a stirrup is there! I always leave the long side attached until the end so I can paint/glue things without touching the actual stirrup.

This is where, if you haven't found the perfect size of stirrup yet, you can compare next to a saddle or horse.

If it looks all good, you can add some silver paint. Go ahead and apply it pretty thick and in a few layers. This helps to "seal" the little valleys between the wires, and make the top where the leather will thread through more realistic by closing up some of the extra space.
Keep something squishy nearby to stick the stirrup into to dry after painting it.
 |
| Notice how I made the top loop bit a little smaller with the paint |
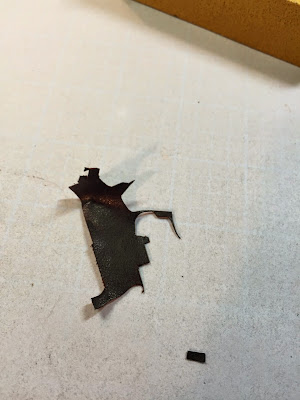
Next, take that scrap leather and cut a little rectangle big enough to fit snuggly inside the stirrup, but not so big it rides up the sides. (I guarantee you'll get it wrong and have to fix it. I have never gotten it perfect on the first try and if you do it's probably through dark magic or something.)
Using super glue or regular tacky glue, stick it to the inside bottom of painted and dry stirrup. I prefer super glue because my interest in any given thing is about as long as it takes super glue to dry, which means if I don't use it here I'll most likely put the stirrup and glue down to dry and never pick it up again. But, if you have a fear of moving too fast or commitment in general, tacky glue is the way to go. (Tell that to the next person you date: "I'm sorry but I feel like I really just need to be tacky glue with you right now")

Anyway, after that you're free to paint the little grip pad whatever color you like! White and black are traditional of course, but because this stirrup is only for the tutorial and I'm an adult and can do as I please I've gone with red for the holidays!
 |
| Classy! |
This is where a silver sharpie really comes in handy. Undoubtedly you will mess up the colored paint just a little, and instead of going back and forth between accidentally putting silver on color and color back on the silver as you try to fix it, you can just take a silver sharpie and gently poke it over where you messed up with color. Easy peasy!
Finally, just trim off the long tail and silver-sharpie the green tip.

Done!! I love these guys because a) I don't have to wait for shipping ever and b) the cost of all the wire and paint and leather I bought that can make hundreds of them probably cost as much as two pairs of the cast guys.
Let me know if you try it and this method works for you! I hope it will help some people like me who refuse to buy certain things. I'd love to see what you guys make!
Grace again: I'll pass along any comments or questions you guys might have right to Anna! And be sure to check out her blog and Facebook page if you haven't already.
That's a really great tutorial! :)
ReplyDeleteThis is awesome!
ReplyDeleteFantastic! this came at a perfect time, I was just needing a few sets of stirrups!Thanks Grace! ♥
ReplyDelete