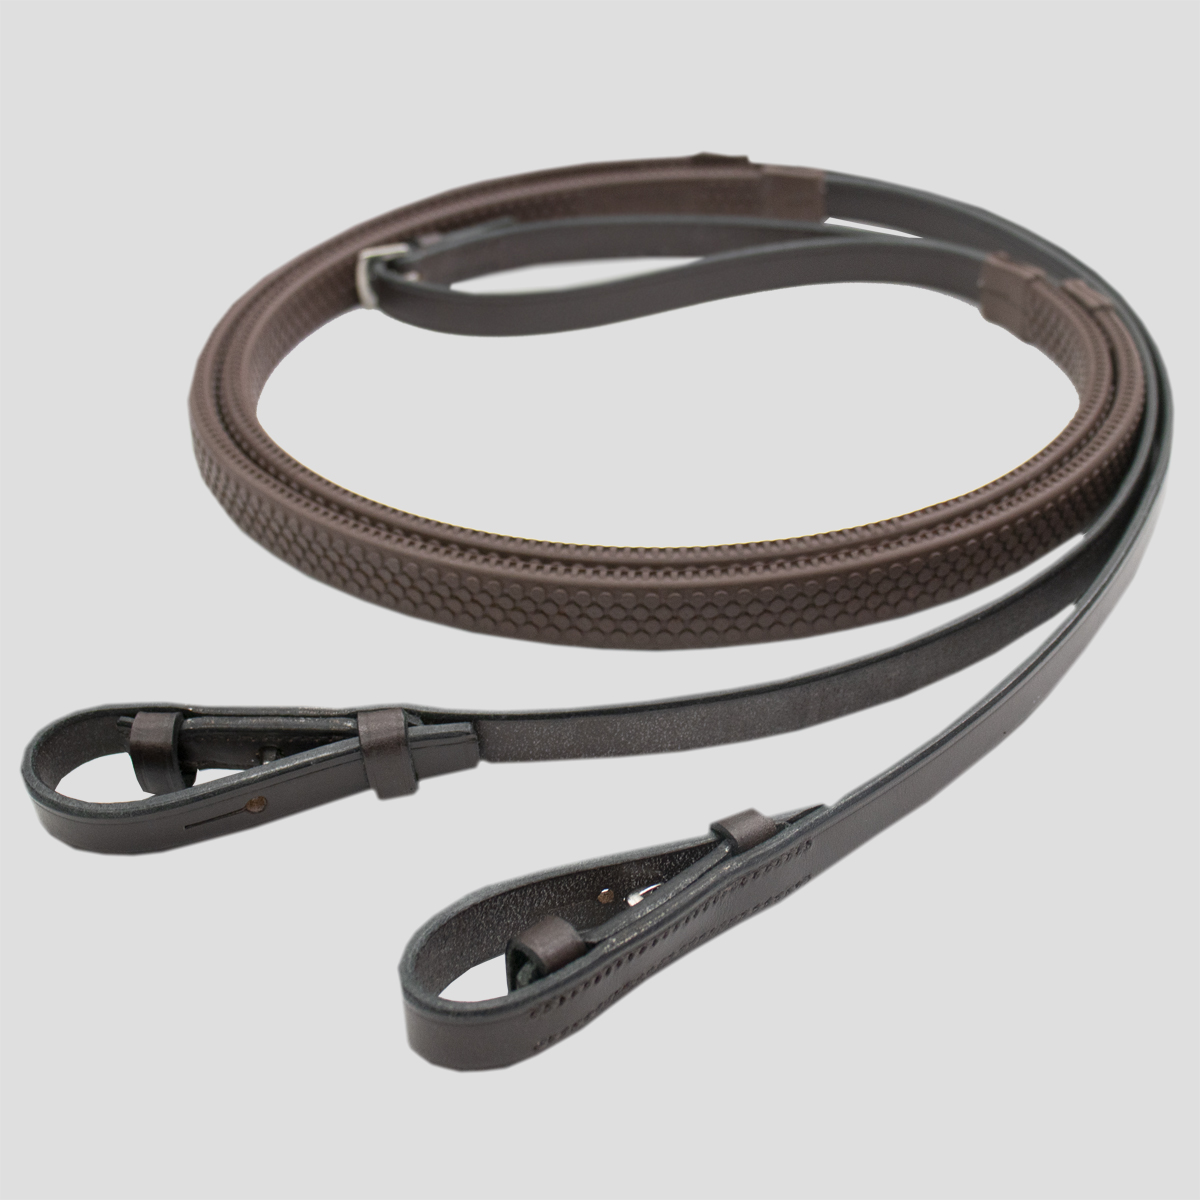
Monday, August 9, 2021

Rubber Reins Walkthrough

Today I figured out how to make pretty nice rubber reins, and I thought it'd be fun to share! It's always so gratifying when a theory of how to make something actually works out.

As usual, we start by looking at the real thing as best we can without physically having it here. In this scale my goal is to add some grid texture and to emulate that super matte rubber finish.


So I whipped up some plain, flat reins...


And marked where the rubber would start and stop. Just like with laced reins, the point of the rubber is to give the rider a better grip, so the rubber only covers the length of the reins most likely to be touched.

The touchable area usually starts about halfway through the horse's neck in this kind of head position, and ends a tiny bit before the buckle connecting the two reins.


Having marked off my rubber area, I covered all the non-rubber bits of the reins with very gentle masking tape.


Next comes texture. That sort of gridded wedded finish reminded me of the metal grippy bit on my ancient Xacto knife...


I love using tools for random tasks they're not designed for!

After dampening my rubber sections with Gum Tragacanth, I just rolled the grippy bit of my knife over them like a rolling pin.


And voila!


All that's left is finish. I finish all my leather with Satin Shene, which isn't particularly high gloss, but for the rubber bits I'm after a super duper matte look.


This is the best easily available dupe I've found for Testor's Dullcote. Anyone who's ever tried painting a horse in pastels knows how many "matte" finish sprays aren't actually 100% matte. Luckily, this one is!

Crossing my fingers that I wasn't just about to ruin these reins I'd been working on all morning, I gave them a very, very light spray, hoping to avoid a buildup of product and a white cast.


Success!


The final touch was these little leather bits (technical term) on all the transition areas from the rubber back to the regular leather.


And they're done!


I'm really pleased with these, considering they're a first try. The Krylon spray doesn't make them too stiff, and my experience with using it on horses makes me think it'll hold up to regular handling just fine.


Now all I need is the rest of the bridle!


Sunday, August 1, 2021

Getting Better All the Time

 Hello! I'm back.

Since I last posted, I got a design degree, got to travel to all kinds of corners of the world, fell in love, planned a huge move across the planet, got derailed by that pesky little pandemic, and found myself somehow back at my parents' place.

So I've dug up all my old tack supplies to make tack lemonade out of virus lemons (ew). For whatever reason I truly believed that tack making is like riding a bike, and picking it back up and making a saddle would be as easy as it was in 2016. Turns out, it's a skill that needs practice and will get rusty if it goes unused long enough!

Like a good art student, I got right to iteration.


This is a chronological line up from left to right, all clearly in various stages of completion. I thought it'd be helpful (mostly to myself!) to go through and note what changes I was trying to make in that iteration, what worked, and what didn't.

Iteration #1: Wait, this is kinda hard?

Ignore my poor tack body horse.

Iteration 1 was so bad my camera wouldn't even focus on it. 

My strategy going into this saddle was purely, using the patterns and techniques I last used before my tack making break, make a saddle. I knew this saddle was mostly about re-learning how to skive and the steps of assembling a saddle, and it definitely achieved that goal.

Clearly, the biggest issue with this guy is bulk. Part of that is definitely due to the fact that I used entirely 3mm cowhide, as I had been before, which is a psychotic thing to do at this scale and should be illegal.

But it mostly had to do with construction and design. Because I didn't properly skive the leather down to paper thinness, my panels and seat/tree were both way too thick and made the saddle sit way too tall off the horse's back.


Saddles do of course have some height to them on a horse, but it's generally a much, much slimmer silhouette than my initial attempt.


Iteration #2: Not fugly!


My second attempt resulted in a fully complete saddle, which is something!

At this point, I had ordered some tooling calf but was impatient and plowed on with my cowhide in the meantime. The reduction in bulk between #1 and #2 really demonstrates to me how much leather prep can pay off - both saddles use the same patterns and same piece of leather, but #2 has a way nicer shape.

By far the part of this saddle I'm happiest with is the top-down view:


I think the seat shape is really nice, especially through the twist. It's definitely a wide, couchy saddle.

Onto the critique:


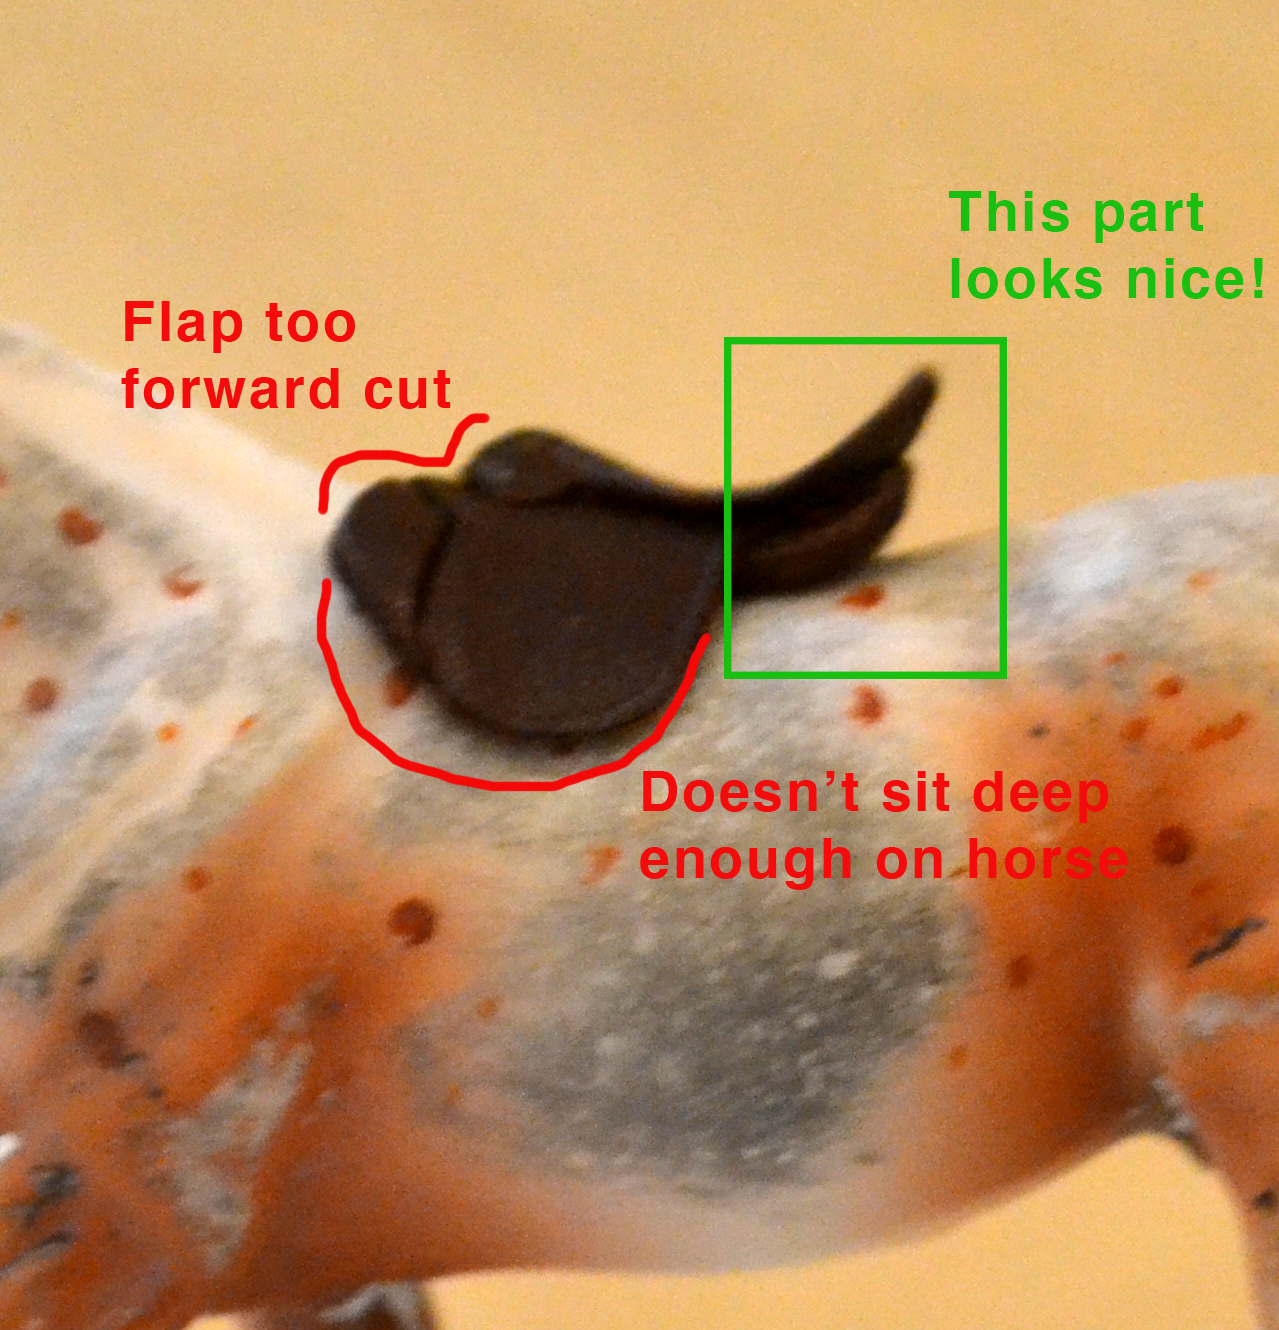
The process of making this saddle with my old patterns reminded me of the ways my old designs bugged me. For me, the hardest parts of the saddle to get looking correct in silhouette are the pommel, cantle, and panels.


I feel like most saddles I make don't achieve the golden trio of a good topline slope from the pommel into the seat; a cantle with a good thickness and angle; and panels that sit mostly flat on the horse's back instead of curving up with the cantle.

So naturally I threw away my old patterns and started from scratch!


Iteration #3: Over-adjusting


I wanted more shape, I got more shape!

The biggest difference in this iteration is the switch (finally!) from cowhide to tooling calf, which is just a million times friendlier. It's still much thicker than skiver or the lambskin I was using for a while, but the grain is lovely and it's much more flexible and buttery than the cowhide.

I also made new patterns to fit Corbin, but underestimated a few things and ended up with the knee rolls on his withers somehow?


It got scrapped before it could get skirts. Onto the next!

Iteration #4: She's got the spirit!

This saddle didn't make it into the lineup up top, oops.

I'm not mad at this saddle.

This is the first iteration with a sculpted tree instead of just using straight soda can, and I don't think I'm ever going back! I'm really pleased with the pommel and cantle shape on this guy.

This is one of my favorite angles of an English saddle, and it's always my goal to be able to mimic this topline silhouette as best as possible:


Not too bad!

This iteration used a mix between tooling calf and lambskin, and I don't think it melds perfectly. The lambskin is way, way easier to get tissue paper thin and stretch over parts like the tree and panels, but it doesn't have the same luster and high-quality vibe of the calf. It was a good experiment, but not worth reproducing.

Overall though, this was my first iteration I felt really good about, and it gave me a much-needed confidence boost!


Iteration #5: My current design!


She's cute, right??

This iteration is by no means perfect or the end of me fiddling with my designs, but I'm pretty proud of where I am! The pommel and cantle shape on this version are both pretty sweet, and I like the saddle's overall shape and silhouette. I've rarely ever done square cantles, but I don't know why not; it's way easier to get a nice smooth leather wrap!

I could easily do another markup nitpicking the issues I still have, but for now, I'm happy to keep making saddles with these patterns. 

Whenever I got discouraged in this entire process or bummed when I decided to scrap another saddle that represented hours of work, I'd dig through my old tack box and find saddles from a decade ago.


As tedious as it can be, iteration works! 


In other news, I made a barn, bought a micro for another micro performance package, and started an Aussie saddle. But more on that later!

Friday, July 14, 2017

Halters, Halters, Halters

I haven't been to Breyerfest since 2012, and every year since, I've sat through this weekend either desperately wanting to be in Lexington or quietly relieved I'm not. This year, it's a bit of both.


I'm compensating by making like a Breyerfest attendee and making halters. They're relatively fast and fun to make, and it's given me a chance to play around with modifying Rio Rondo etched silver plates to fit this scale. So much shiny!

I have six total halters that will be up for grabs this weekend, ranging from all decked out in silver to plain ol' flat leather. For those interested, three will go up on MH$P tomorrow night at 5pm PST, and the other three will go up on Sunday night at the same time. 

(Turns out the above plan was overly ambitious for my weekend schedule- let's make it a Breyerfest week of halters instead!)

I think of halters as such a "treat yo' self" item- cheap, fun, and hassle-free! Hopefully there are others out there also beating the Breyerfest blues at home. To those attending, keep posting your pictures! I love living vicariously. 

Monday, July 10, 2017

The Micro Hunter

It's becoming clear to me that I just really, really like micro jumpers. But I did decide that after two cross country projects, it was time for a little back to basics.


This was another project I started in 2015 and eventually deserted for one reason or another- finding a project already partially completed is always a treat!


This little guy is Maggie Bennett's "Jumping Mule" sculpture, who is no longer a mule but instead a neatly braided bay hunter with some sweet high whites.


Hunter jumps fall easily into the trap of white poles and forgettable standards, so I knew I wanted to try something a bit new and different for this one. Each little shack standard was constructed board-by-board, then weathered down and accented with some moss to really give a lived-in, outdoor life look.


The little trees were sculpted by hand with Apoxie, texturized with rough sandpaper for some believable bark, and decked out with my new favorite thing ever, Woodland Scenics' foliage flocking. When I originally bought this stuff, I was confused and disappointed by its clumping, stick-together quality; I thought I'd purchased a bag of loose flocking! Turns out this was a blessing in disguise, as this stuff makes for the best no-mess tree flocking I've ever used.


The top layer of the base is sculpted specifically to hide the horse's attached base, and I love the balancing illusion of the final product. He's still fully attached to his solid pewter base, it's just hidden in the "sand"! For once, I have no worries about the horse coming unattached from the base or tipping over.


Sculpting on that top layer of the base also provided an opportunity for packing in some extra detail such as sandy texture and itty bitty hoof prints. I think the lack of a glass-smooth surface adds to the arena dirt illusion!


And finally, an obligatory scale picture:


I've been really, really enjoying making these self-contained micro dioramas. While it makes my heart happy to hear people are taking them to shows (facing off against horses five times their size!), I also think they make lovely little shelf pieces. There's something so satisfying about this scale!


Tuesday, June 27, 2017

Dressage, Again

The last SM scale tack set I made was an upper level dressage set for the new(ish) mini Valegro mold. Naturally, the next set I felt compelled to make was... an upper level dressage set for the new(ish) mini Valegro mold?


What can I say, I had some nice shiny black leather and new gold wire to try out, it had to be done.


While it's not glossy, the finish on this set definitely has a bit more shine than I'm used to. Upon re-reading one of Anna Helt's older blog posts, I realized that's because my Tandy Satin Shene finish is extremely old, and while it still functions perfectly well as a sealant, it's definitely lost its totally matte quality. 


I think the finish makes it look like a doted upon fancy expensive saddle someone spent many hours buffing and cleaning- perfect for this very fancy set!


I finally got myself some 34 gauge gold wire (something I've somehow gone without thus far), so the bridle sports all-gold hardware for an extra bit of bling. It also features one of the nice etched bits I purchased in a lot off eBay a thousand years ago- I think it looks way sharper than plain wire!


Double bridles are one of those things I'll spend ages fiddling with, because I know that however much effort I put into making all the little straps fit correctly will directly translate into this nightmare of a bridle being easy and breezy to tack up for future users. Hopefully worth it!


This set also uses the new method of making saddle pads I discovered last year, meaning the pad fits the horse's top line perfectly and retains a realistic shape even when it's not on the horse. It's not a particularly difficult thing to do, but it makes my heart extremely happy. 

All together, a very satisfying set!


And finally, a little sneak peak at my cheater dressage girth: the billets are already buckled on the girth, so the regular sticky waxing method works perfectly fine. Hurray for shortcuts!


For my next set, I'm thinking I want to swing back the other way and make something really laid back, casual, maybe suited for a trail ride... we'll see!