Saturday, September 19, 2015

Studio Update: September 19

Some things that have been happening:

Tiny props...

Tiny houses...


Tiny grass...


...and a huge mess in the studio. I'm working on individual posts for each project so it'll hopefully be a bit easier to follow- stay tuned!


Saturday, September 12, 2015

Grassy Base Walk-Through

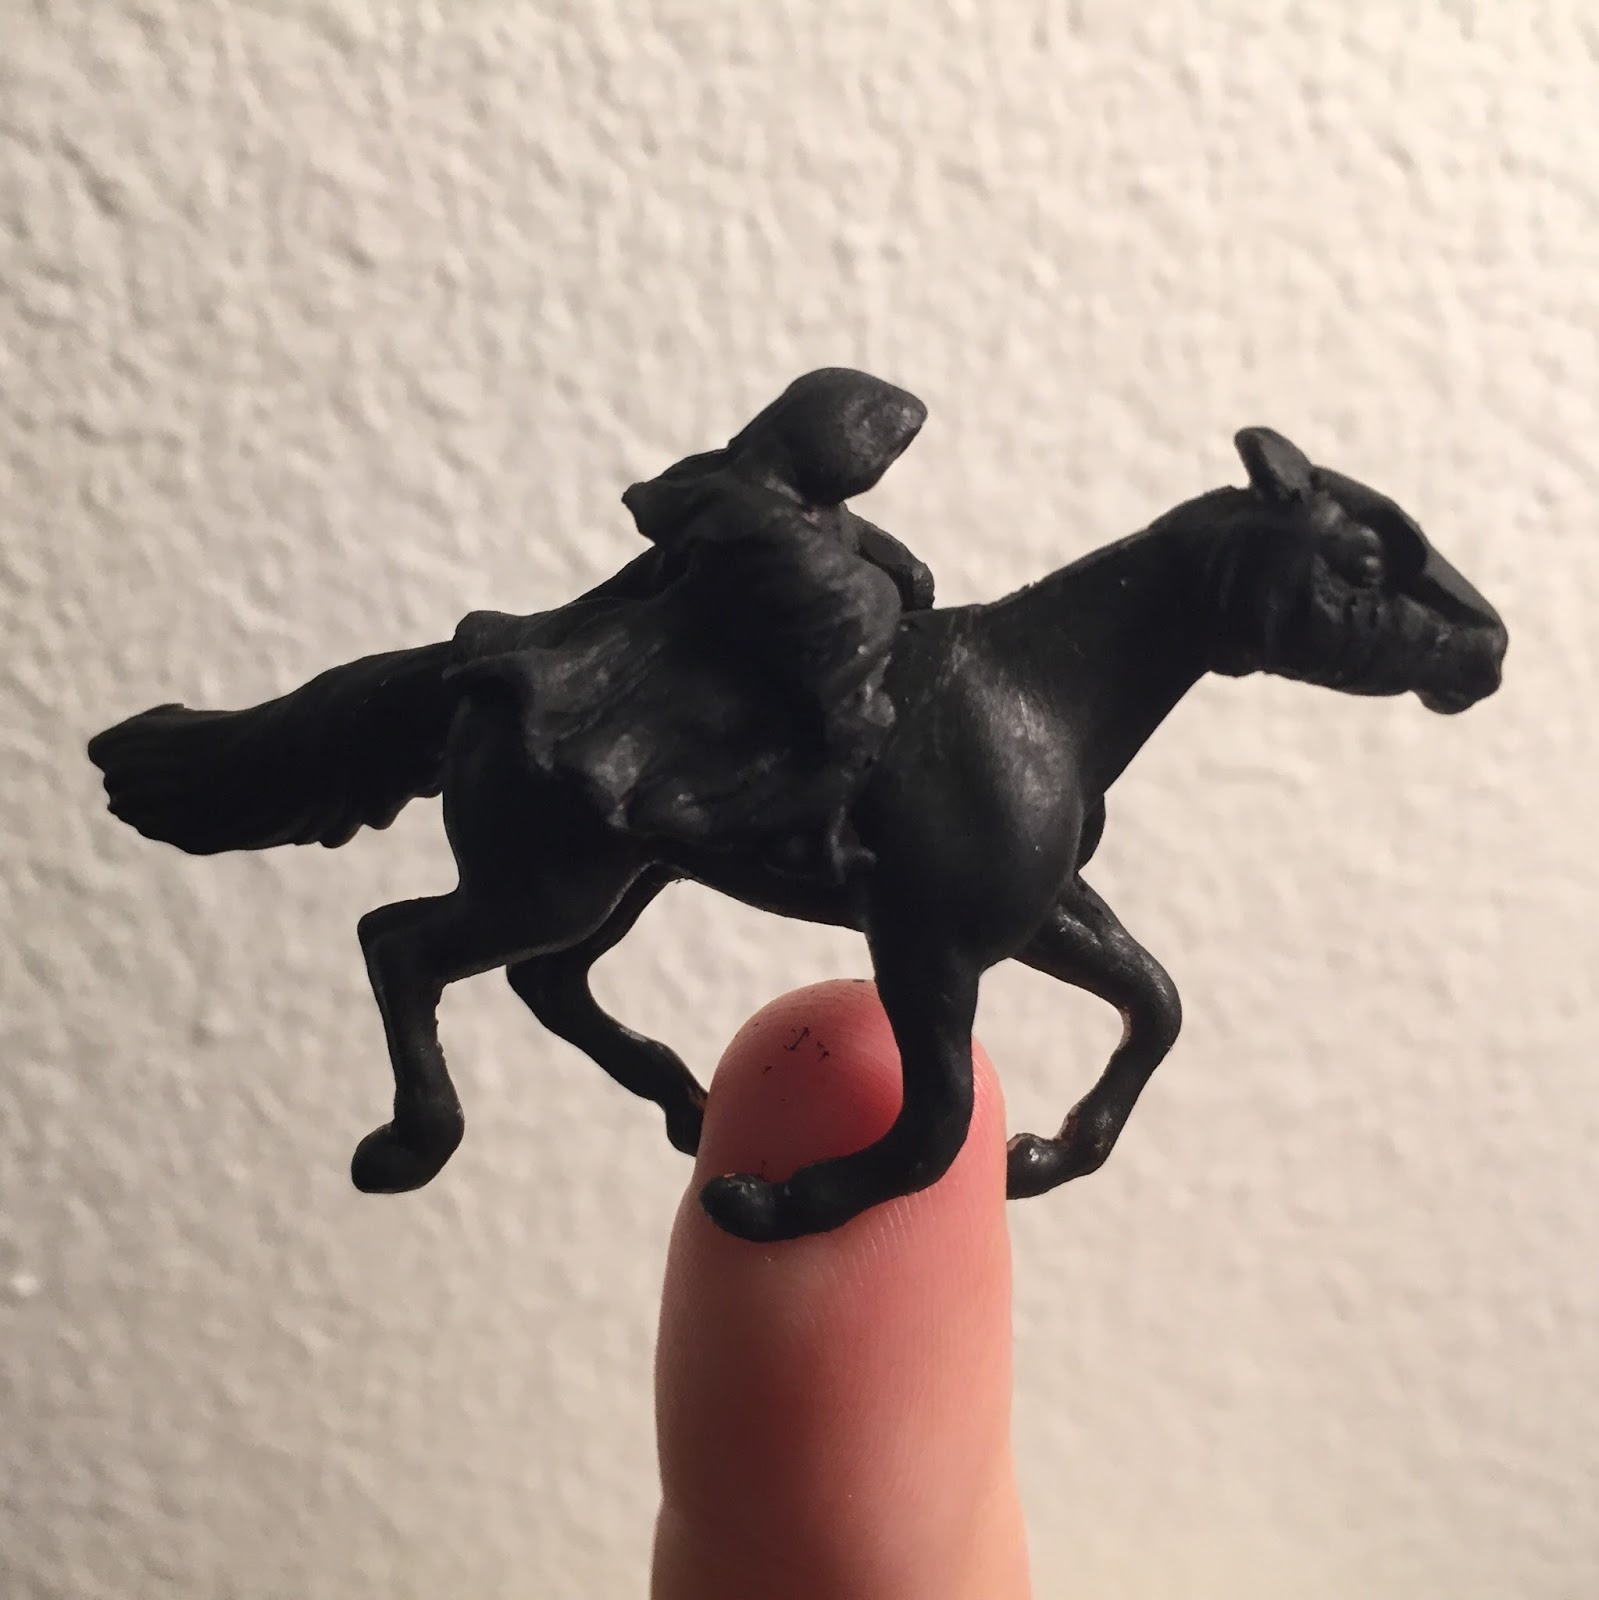
While I had a great time sculpting and painting my little Nazgûl, the most exciting part of the project for me was the little grassy base.


I've been lurking Pinterest, and came across a few tutorials by fellow miniature makers on how to make realistic (non-hobby shop) grass on the cheap- this is my experience with my take on the methods I came across.


I started by cutting out a little rectangle from cheap-o craft wood, then covering it with a scrap from an old sand-colored grass mat. Some big grain sandpaper or even just sprinkled sand would work too.


I knew that I wanted the base to be somewhat dead-looking and colorless (all the more creepy and ringwraith-y), so the light sand made a good bottom layer. 

I then reached for my handy jute twine (a few bucks at Rite-Aid), and the jute twine I'd dyed green back when I was working on the micro water jump. The dyed twine was just cut into two inch long sections and left to soak in dark green Rit dye overnight.


A badly-lit comparison of the regular twine and dyed twine; the dye made it a lot darker, but the green is very natural looking and blends well with the undyed tone.


The next step was to snip off teeny tiny slices of the twine, probably about a millimeter each, into a Dixie cup. Ta-da! Micro scale blades of grass. I chose to use a mix of the undyed and green twine to get a nice mix of tones.


Using an old wet paintbrush, I took some Tacky glue and dabbed along the edge of the base where I wanted the grass to be.


Tacky glue dries fast, so I sprinkled the grass on as I went to make sure it would be "grabbed" by the glue.

More gluing...


...And sprinkling the grass on.


A good tip is to leave all the grass on top of the glue until it dries completely, instead of immediately tapping off the excess. Again, to get the maximum amount of grass actually attached.

After dumping the grass on the glue and letting it dry, I was left with this:


I found the twine bits to be really static and they didn't really want to come off with just the normal tapping. I ended up using another old paintbrush to gently brush away the excess grass sitting on top of the grass actually glued to the base.

On the top is the side I've brushed, the bottom still has all the excess grass:


And just the secured grass!


While this isn't a bad-looking base on its own, I wanted to keep playing with it.


Taking a tiny bunch of twine and snipping off a 5mm length, then sticking that bunch into a dot of glue on the base led to some nice grass tufts:


After letting those dry completely, I went back in with my scissors and old paintbrush and fussed with them until they looked a little more natural:


And the final step was to take a tiny bit of dark brown pastel dust and give the sand base some lowlights and depth:


I ended up painting the edges of the wood black, too.


Ta-da! Teeny tiny grassy path, fit for a teeny-tiny Nazgûl to gallop down.


Thursday, September 10, 2015

Ringwraith Pics

This little guy is all done and up for sale on MH$P here!

Sold! Off to a new home.


Monday, September 7, 2015

My Life and Nazguls

Hello!

It's been a while. Here's the situation, in bullet point form in an effort to make this all easier to digest:

First, the fun news:

  • I just recently got back from a summer away at a pre-college art school program, where I had the time of my life and picked up SO many new artsy tricks, both technical and to do with the creative process in general.
  • The micro mini diorama set I made and sold last spring went with its new owner to NAN 2015 and ended up with a gold cookie! Check out its trophy shot here. I'm completely flattered and shocked that my work could be recognized at this level of competition- a big congratulations to its proud owner Amy!
  • Last fall, Bobbie Kolehouse contacted Anna and I, asking to write a story about us for MEPSA. We were more than happy to comply, and that story can now be read in the 2015 MEPSA Champ Book! Bobbie wrote a lovely piece about our friendship, real horse lives, hobby histories, Christmas raffle, and tack making careers- we're so honored to be featured in such an incredible publication as the Champion book. Jennifer Buxton recently posted a picture of part of the article, featuring a picture of Anna and I circa age ten. (See two little girls in helmets, one in an entirely royal purple outfit. Oh, little me.)
The less fun news:
  • I'm starting college this year, and will therefore have a considerably smaller amount of time available for the hobby.
  • I'm also in a bit of a hobby slump; I don't feel that inspired to make tack, I don't have much desire to add new ponies to the herd, and I'm feeling burnt out on working on my own performance entries.
  • All of this meaning that for the time being, I've decided to stop taking on tack orders. I don't feel like it's fair to a customer to have to wait for however long it could take me to find the time to finish their order, and it's not fair to myself to spend my free time working on things that I don't feel passionate about doing. This hobby is a happy, restful place for me, not a job, and anything I can do to keep it that way is a good choice for me.
Looking forward...
  • I'm definitely not leaving the hobby altogether- I still have some fun projects that I want to try to make happen, mainly in micro scale! It's such a challenge, but it's a fresh new challenge in a way that Stablemate tack hasn't been in a while.
  • I want to do more experimenting with base/diorama building, trying to bring my pieces to the next level of realism that mini performance entries tend to be lacking (understandably- this stuff is tiny!). 
  • Anything I finish and feel confident about will probably be for sale, seeing as I don't have the time or energy for live shows right now. 
  • I'll also be thinning out my own performance showing supply a bit, trying to get my tack and props into homes where they'll be able to get out in the show ring where they belong!
  • As I work on my micro projects, I'm making an effort to take more pictures so I'll have plenty to post about on here- maybe some tutorials as well?
And finally, some pictures!


I busted out the Apoxie Sculpt and found an old Breyer Mini Whinnie during a recent Lord of the Rings marathon, and this happened.


A teeny tiny Ringwraith!


Overexposed, but at least you can kind of see him better.


I was originally just going to have this guy be a sculpting practice piece, but I really like how he's coming out. Maybe I'll sell him when he's done? Is there even an interest for teeny tiny Nazguls? Worth a shot!