
It's spring break, and I've been working like a mad woman.
The tack making has been pretty sparse, but this working western saddle did get done:
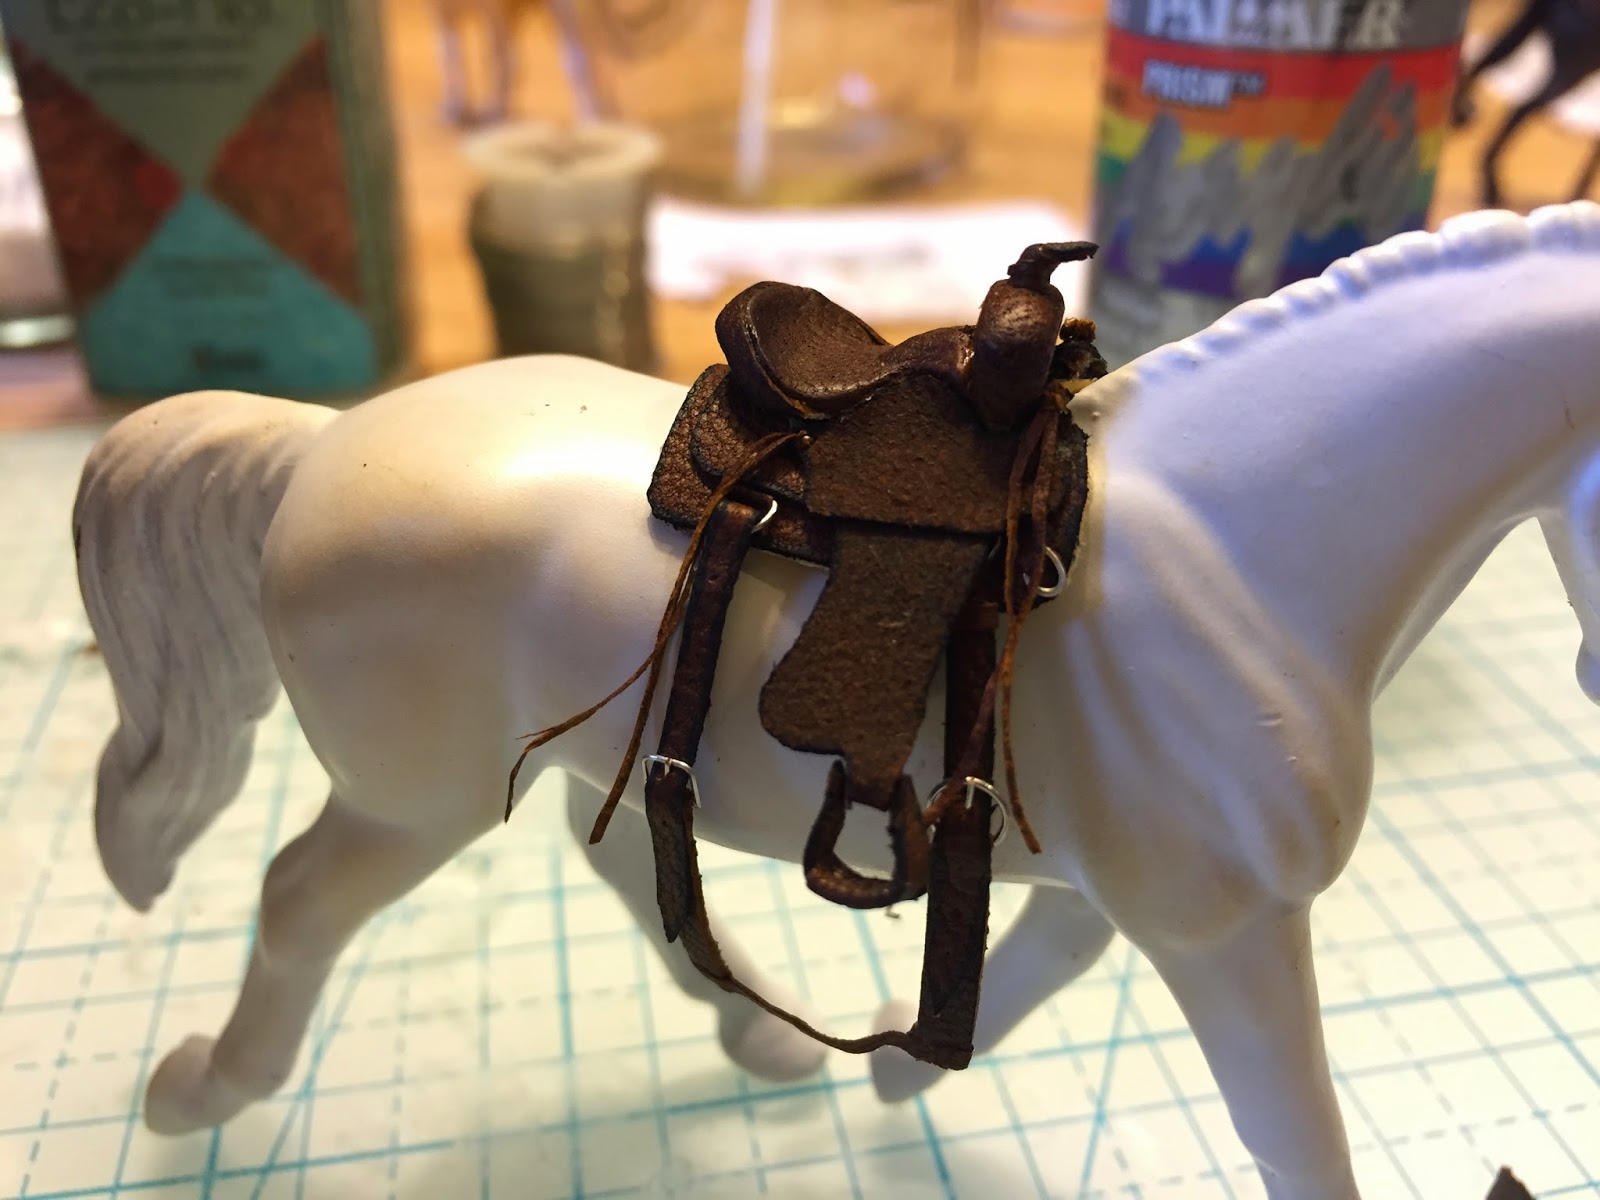
The tassle-y things need trimming, but overall I'm pretty pleased with how it came out!
The rider from last post has had a change of heart and become a casual western rider to go with that saddle.


I'm thinking a helmet and blue jeans situation?

As for the cow I started...

I think the vision was cute, but the whole reason for sculpting a cow from scratch was because I couldn't find an adult sized cow anywhere else- and my sculpture was too babyish! Ugh!
So here's my Cow 2.0:


He's definitely not winning any conformation competitions, but I hope he'll be good enough to run away from my cow horses! Next up for him is legs and a face job (a face lengthening job, to be exact).
And finally, the monster project, because without the hand jump to work away on I have a hole in my life.
I figured that if I'm going to try my hand in western at NW Expo, I should at least have some interesting or slightly different entries, seeing as the probability of winning much in CM/AR western is pretty slim. But when I'm showing Prudence, I like to be able to have references of Fjords in that actual event or something very similar, especially in working western classes and other areas that you might not immediately associate with fluffy Norwegian ponies.

Google graced me with these lovely images, and the spark was lit.

Natural trail obstacles? Inside? What is this madness?

The madness is the Oregon Horse Center's Mountain Trail course, which is exactly what it looks like: a massive indoor arena built up with Northwestern natural materials to mimic the terrain you'd find riding the mountain trails.

Unlike the actual wilderness, the terrain at the OHC is arranged in to in specific patterns to create obstacles that you'd see in an arena trail class, such as boxes for turns, gates to open and pass through, and bridges to cross:

As far as I can tell, it looks like they change up the course every year or so to keep competitors on their feet and offer new challenges for the riders who come just to ride the course for fun. This is an incredible venue; the water obstacles alone are drool-worthy!
While it seems that most riders navigate the course at a walk, there are some who speed it up:
And of course, out of all those incredible obstacles, the one to really catch my eye was the waterfall in the upper right hand corner of the arena diagram above.

The waterfall is a trademark of this arena; some years the obstacle is to ride between the water and the mural behind it, and some years (pictured here) riders pass through a small pond at the foot of the waterfall.
 |
| All these photos and the video feature Mark Bolender, who's kind of the head honcho in the world of these extreme mountain trail type courses. |


I've had a desire lately to try my hand with some artificial water (my little cross country base was lackluster, and Anna's has me all inspired), and I had a chunk of time to play with, so it was clearly meant to be.
I didn't get any pictures of the initial flurry of inspired work, which was just measuring and cutting up some one inch foam. You can see the three layers stacked up on the side here:

Next was obviously the paper mache stage, which helped the three harsh layers blend together into one more coherent shape.

There were still some edges that were a big harsher than I'd like, so in went some sneaky tin foil crumbles to fill up weird spaces. Here's one bit in the process of being covered:

Then on to color!

Gotta love when your spray paint can has a dark chocolately brown cap, and comes out brick orange.
At this stage, it was still looking pretty fourth-grade-science-project-y, but I did like how the paper created kind of geometric, rocky shapes.

I made my first trip of many out into the wilderness to retrieve some premium Washington dirt, then proceeded to take an hour sifting and shifting it until I was down to the finest grains.

One of my new favorite things is spray Tacky Glue, which is what I used to get all that dirt onto my orange mess of a base. I found it held the dirt really well, and even worked as a topcoat to keep it all stuck together and non-shedding. The only issue I ran into was that slight cloudiness or frostiness you can kind of see in the above photo... but I'm pretty sure that's just where I held the can in one place too long.

More wilderness excursions took place to harvest the rocks and debris mimicking the real course.

What's interesting about adding all the rocks and stuff to this base is trying to make it all look natural, but not too natural. The real thing is man-made and doesn't look exactly like the side of a mountain- it does look like people brought in rocks and set them down in there. This is kind of a tricky look to mimic without just looking like you failed at making a natural trail base!

Here we have the frame in place to hang the mural and waterfall. (The little pine trees were an experiment, later decided against).


The green fabric is a temporary stand-in for the mural (just to see how it'll look with that space filled). I think the whole thing is starting to look pretty cool!

Another little project: a judge to keep watch over my Fjord, currently with his feet taped down in an effort to get him to stand up for a picture!

I'm so excited to get some water action in there!

One dilemma I'm facing while thinking about the water is, where's the horse actually going to be? I was initially planning on having her departing the water, like so:

But there's a left turn pretty sharply after the water, and both my horse and my rider are looking straight forward. Then I thought maybe entering the water? With one foot splashing? But Prudence's head is low, and I feel like a real horse would carry their head up and away from the spray and splashing...

Still some thinking to do there. No matter where I put her, the dream is to have little removable splashes that I can add or take away depending on her position, and to make the base more flexible with other horses in the future.

We'll see how that goes!
Next on the to-do list while I wait for my fancy water to arrive, is figuring out how to make or acquire some sapling-type evergreen trees to scatter in there, and of course finishing up the rider, judge, and cow.
On top of that, I've volunteered to make tack as a donation for NW Expo, and have some tack items to finish up for myself and orders.
Can I have another week off please?
I'm so impressed by how fast you work! Very cool. I can't wait to see the diorama at Expo!
ReplyDeleteWhat is the 'water' that you use? I also cant wait to see pictures of the finished product; you really are amazing!
ReplyDelete